Construction of Square-in-Square Quilt
We start by creating a segment AB. We wish to rotate point B about point
A by 90 degrees. To do this, we click on the button with the
reflection icon ![]() and choose
the 'Rotate around Point' option.
and choose
the 'Rotate around Point' option.

Then, click on point B and then point A (in that order). A dialog box will pop up for the rotation angle. Enter 90 for the angle and hit 'Okay.' Point B will be copied and rotated, forming point C. Likewise, rotate A about C by 90 degrees to get point D. Connect the points to get square ABCD.

We now create a filled area for triangle ABC. To do this, we will use the Polygon
tool. This is the button with the Polygon icon ![]() .
Click this to make it the active tool and then click on
B, A, C, and then on B again to form the filled area.
.
Click this to make it the active tool and then click on
B, A, C, and then on B again to form the filled area.

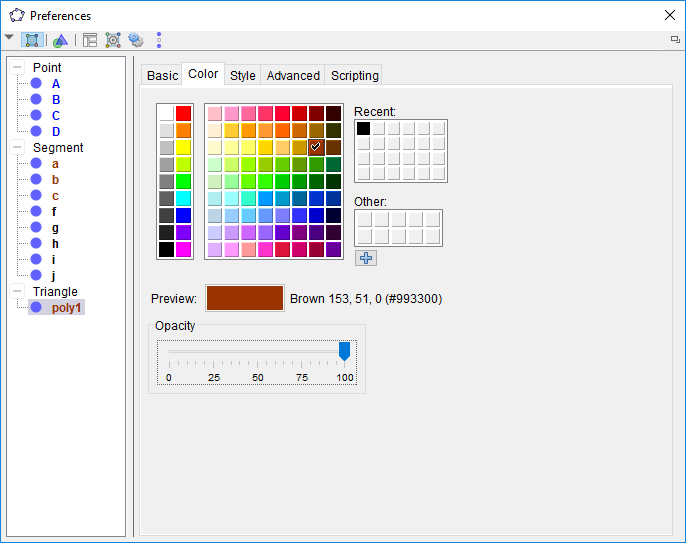
The area is transparent by default in GeoGebra. If we want a more solid area, we can right-click inside the area and choose 'Object Properties...' In the window that pops up we can adjust the transparency by choosing the 'Color' tab and then adjusting the 'Opacity' slider. We can also change the color.
Next, we will reflect this square shape across CD. Under the Transformation button, make sure the 'Reflect about Line' tool is selected. Then, do a box selection around the square and click segment CD. The square will be copied and reflected across the segment. You may want to turn off the auto-labeling feature of GeoGebra as more and more objects are created. To turn off the labels, go to the Options menu and select Labeling -> No New Objects .

To finish the basic block, we reflect this new shape across DB.

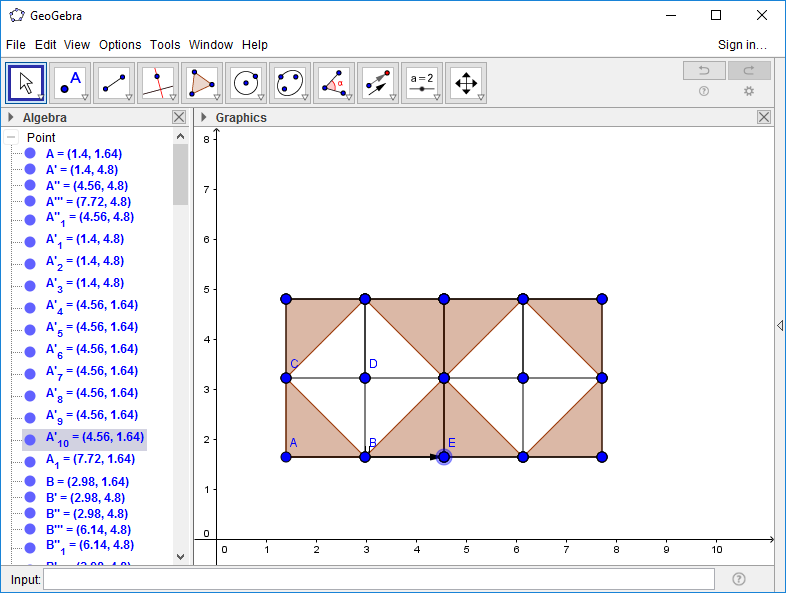
To make more blocks, we translate this basic block.
Before we translate, we may want to move the block a bit to the left.
To do a translation,
choose the 'Translate by Vector' Tool under the Transformation button
![]() .
Then, select the entire block and click on points A and E (in that order).
.
Then, select the entire block and click on points A and E (in that order).
The remaining constructions and exercises in Project 7 should now be doable.