Sketchpad Tool Bar
The main tools used to create geometric figures in Geometer's Sketchpad
are located in a vertical
tool bar of buttons at the left side of
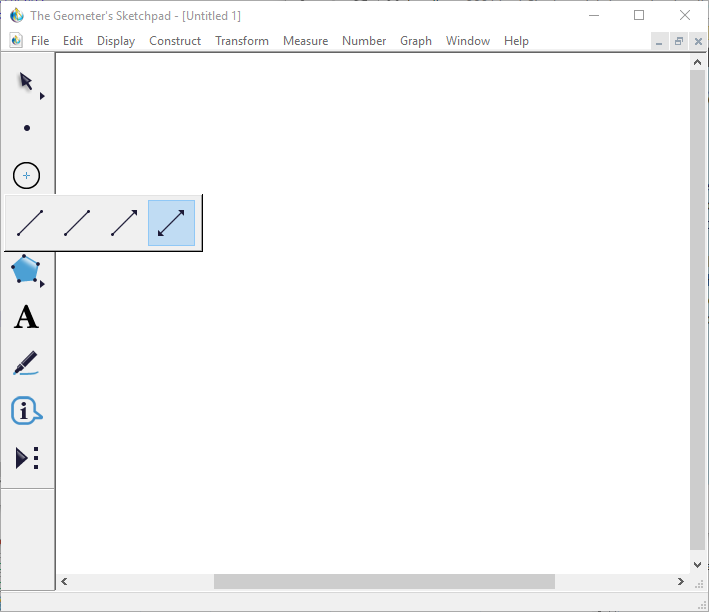
the application window. Some of these buttons have a small black triangle at the bottom right.
Clicking once on any of these buttons reveals a list of menu items.
For example, here we have clicked on the Segment button and dragged
over to the
Line menu item. Once we release the mouse, this tool becomes the active tool in that group.
Lines and Segments
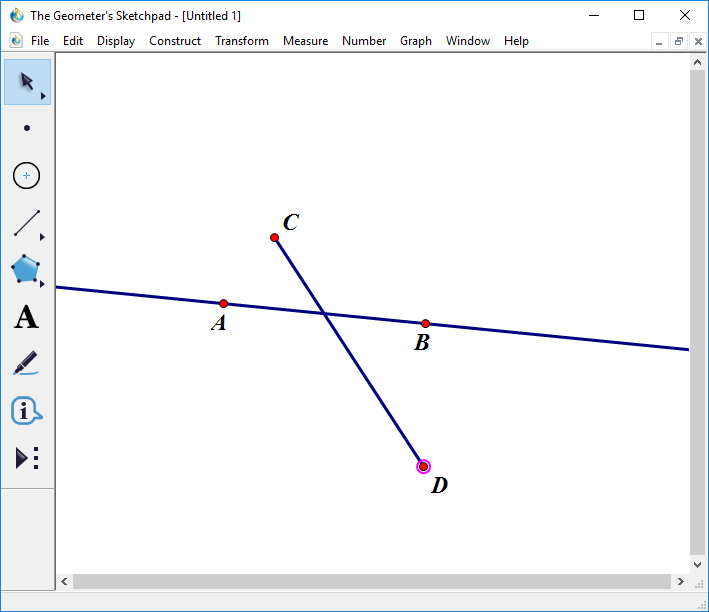
To illustrate the use of a tool in the Toolbar, we will create a line defined by two points.
Click on the Line Button and then click
somewhere in the window and drag.
Notice that Sketchpad creates a point (A) where you first clicked and a second point(B)
where you released the mouse. These define the line. Note that Sketchpad does not automatically
show labels for points. To see the label, we can right-click (Mac OS: ctrl-click)
on a point and choose 'Show Label.' If we want Sketchpad to automatically
label new points, we can go to the Edit menu and select Preferences...
In the dialog that pops up, we can click on the 'Text' tab and then click
'Show Labels Automatically -- For All new Points.'

Now, let's create a segment. Click on the Line Button and drag over to select the Segment menu item. We have changed the functionality of the Line tool so that it is now a Segment tool. This is a fundamental technique used to provide for multiple tools with just a few buttons. With the Segment Tool now active, click and drag to create a segment.
To Learn More
Try experimenting with the various tools in the Tool Bar. If you want more general info on using Geometer's Sketchpad, there are numerous on-line tutorials. A nice brief intro is at this site . The Geometer's Sketchpad web site has resources at this page .