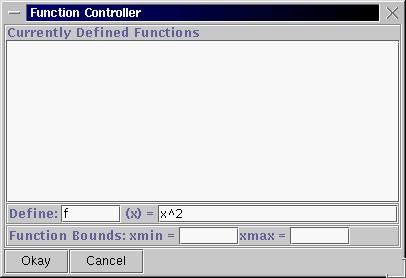
1. Start up Geometry Explorer. Choose "Show Axes" under the "Graph" menu. We will be working with the graph of a parabola in this project. The equation for a simple parabola can be expressed as f(x) = x^2. We will create the graph of f(x) by choosing "Add Function to Graph..." under the "Graph" menu. A dialog box will pop up which will allow us to define f(x) = x^2. Type in "f" and "x^2" in the two text fields as shown:

2. Once we hit the "Okay" button our function will show up in the main window.
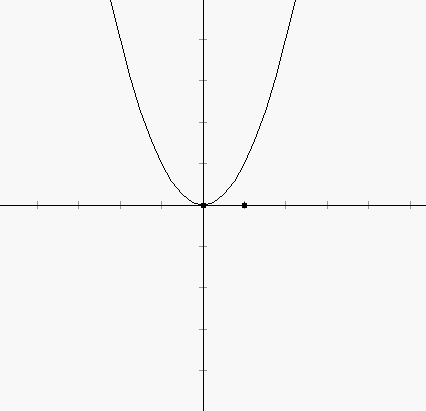
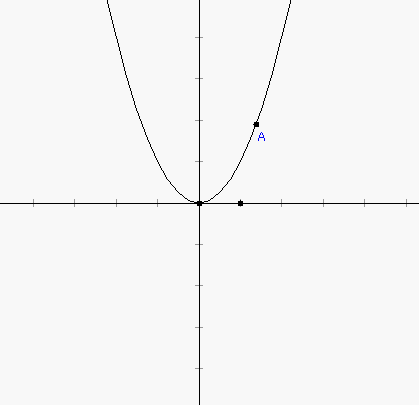
3. Now we will "attach" a point to the graph of this parabola. Click on the point tool (2nd button in first row of buttons labeled "Create") and then click the mouse somewhere on top of the parabola. A point will be created that will always be attached to the parabola, even as we move it around. (Try moving the point around to see this behavior). This is point A below.
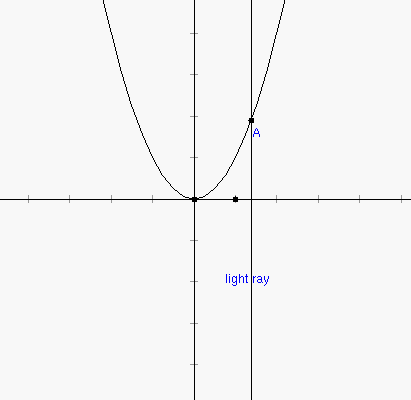
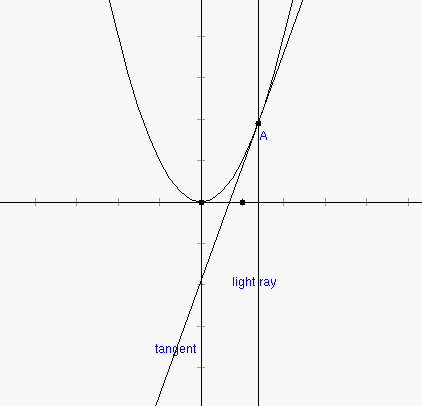
4. Now, we are going to create a line that is parallel to the axis of the parabola. To do this, select the x-axes and point A and click on the perpendicular button (the third button in the first row of the "Construct" group of buttons). We can think of this perpendicular as a light ray coming into the parabola.
5. What happens at the point where this ray of light hits the parabola at A? That is where will it be reflected to? From the basic laws of optics we know that the ray will be reflected so that the reflected ray makes equal angles with the tangent line to the parabola at A. To create the tangent line, select point A and then choose "Tangent to Arc/Circle/Function at Point" under the "Misc" menu.
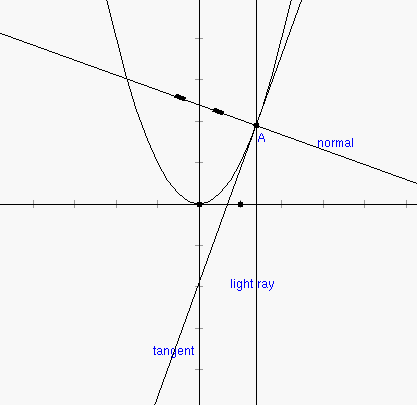
6. To create the correct reflected ray, we first create a perpendicular to the tangent line through A. Select A and the tangent and hit the perpendicular button to get this normal line to the parabola at A.
7. Now, we just have to reflect the light ray across the normal to get the correct optical ray that would be the reflected ray at point A. To create a reflection we first select the normal line and then choose "Mirror" under the "Mark" popup menu in the "Transform" group of buttons. What we have done is create a reflection transformation that will reflect any object across the normal line. Next, we select the light ray and hit the reflect button (2nd button in 2nd row of "Transform" group of buttons) to get the reflected ray.
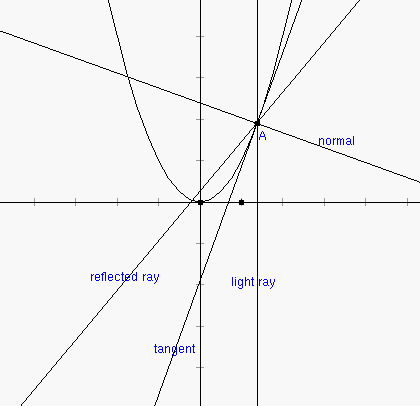
8. Move point A around and notice what happens to the rays we have defined. What do you notice in particular about where the reflected ray crosses the y-axis? Let's find the intersection of the reflected ray and the y-axis. Select the reflected ray and the y-axis and hit the intersect button (The first button in the first row of the "Construct" group of buttons). The point of intersection will be calculated. This point is called the focus of the parabola. All of the incoming rays parallel to the y-axis get focussed on this one spot.
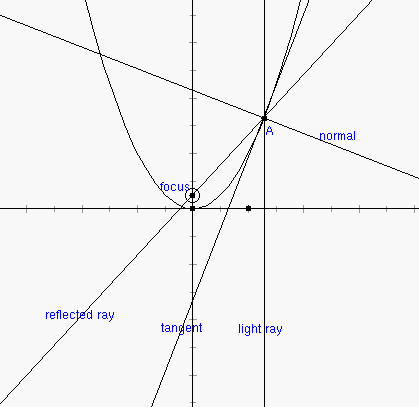
9. This optical property of a parabola is incredibly useful in any application
where one wants to collect incoming rays (e.g. satellite dishes and telescope
mirrors). On the other hand if we locate a light source at the focus, then
the rays it gives off will be directed out of the parabola in parallel
lines. This can be seen in everyday objects such as flashlights and car
headlights.